

A practical guide on collecting representative images for WipFrag analysis
Contents
Getting Good WipFrag Results
Good WipFrag results begin with images that are clear, properly scaled, and representative of the material being measured.
Before capturing an image, ask:
- Can I clearly see the particles I need to measure?
- Does this image represent the material I am measuring?
- Am I using the correct scaling method?
For large or variable samples, capture multiple representative images rather than relying on a single photograph.
General Capture Rules
| DO | AVOID |
|---|---|
|
✓
Fill the image with the material being analyzed.
|
✕
Large areas of sky, floor, walls, equipment or background.
|
|
✓
Capture sharp, well-focused images.
|
✕
Motion blur or out-of-focus particles.
|
|
✓
Use even lighting that keeps particle boundaries visible.
|
✕
Deep shadows, glare, or overexposure.
|
|
✓
Capture enough particles to represent the material.
|
✕
Extreme close-ups containing only a few particles.
|
|
✓
Include the relevant range of particle sizes.
|
✕
Selecting only obvious coarse or fine areas.
|
|
✓
Keep the capture method consistent when comparing samples.
|
✕
Changing the method between comparable samples.
|
|
✓
Use optical zoom or change your working distance when needed.
|
✕
Digital zoom.
|
|
✓
Use multiple images for large or variable samples.
|
✕
Assuming one convenient photograph represents the whole sample.
|
| REMEMBER |
| WipFrag can only measure what the camera can see. If a particle cannot be clearly distinguished in the original image, it cannot be reliably measured from that image. |
1. Terrestrial Images – Piles, Stockpiles, and Bulk Material

Sample the pile – don’t just photograph it
Muckpiles and stockpiles are rarely uniform. Coarse material may collect toward the toe or edges of the pile, while smaller material may collect elsewhere or become hidden beneath the surface. The same principles also apply when analyzing joint planes with WipJoint.
Capture several representative areas rather than photographing only the easiest or most obvious location.
For a large pile:
- Capture several areas across the pile, do NOT take several images of the same area.
- Include both central and outer areas where practical.
- If the pile is being excavated, capture newly exposed material as it becomes available (if possible).
- Keep images from the same pile, blast or sample grouped together for analysis.
For general rockpile work, five or more representative images is a useful starting point. Use more when the pile is highly variable or when oversized particles are especially important.
Where practical, capture hundreds of visible particles in each image. Avoid framing so tightly that one large particle dominates the view.
Position the camera
Face the material as directly as practical and fill the frame with broken material.
Keep the camera reasonably square to the material surface. Stand far enough back to reduce perspective distortion, and use optical zoom when needed to fill the frame from a better or safer working position.
Avoid close, wide-angle photographs of sloped piles. They exaggerate the particles nearest the camera and make the farther material appear smaller.
Choose the right viewing distance
Work close enough to clearly see the particles that matter, but far enough back to capture a representative area.
If you are too far away, smaller particles may disappear into the image. If you are too close, the image may exclude larger particles or too much of the pile.
For broad size distributions, capture additional closer or wider views rather than expecting one image to represent every particle size equally well.
Scaling terrestrial images
Use the scaling method that matches how the image was captured.
Auto Scale
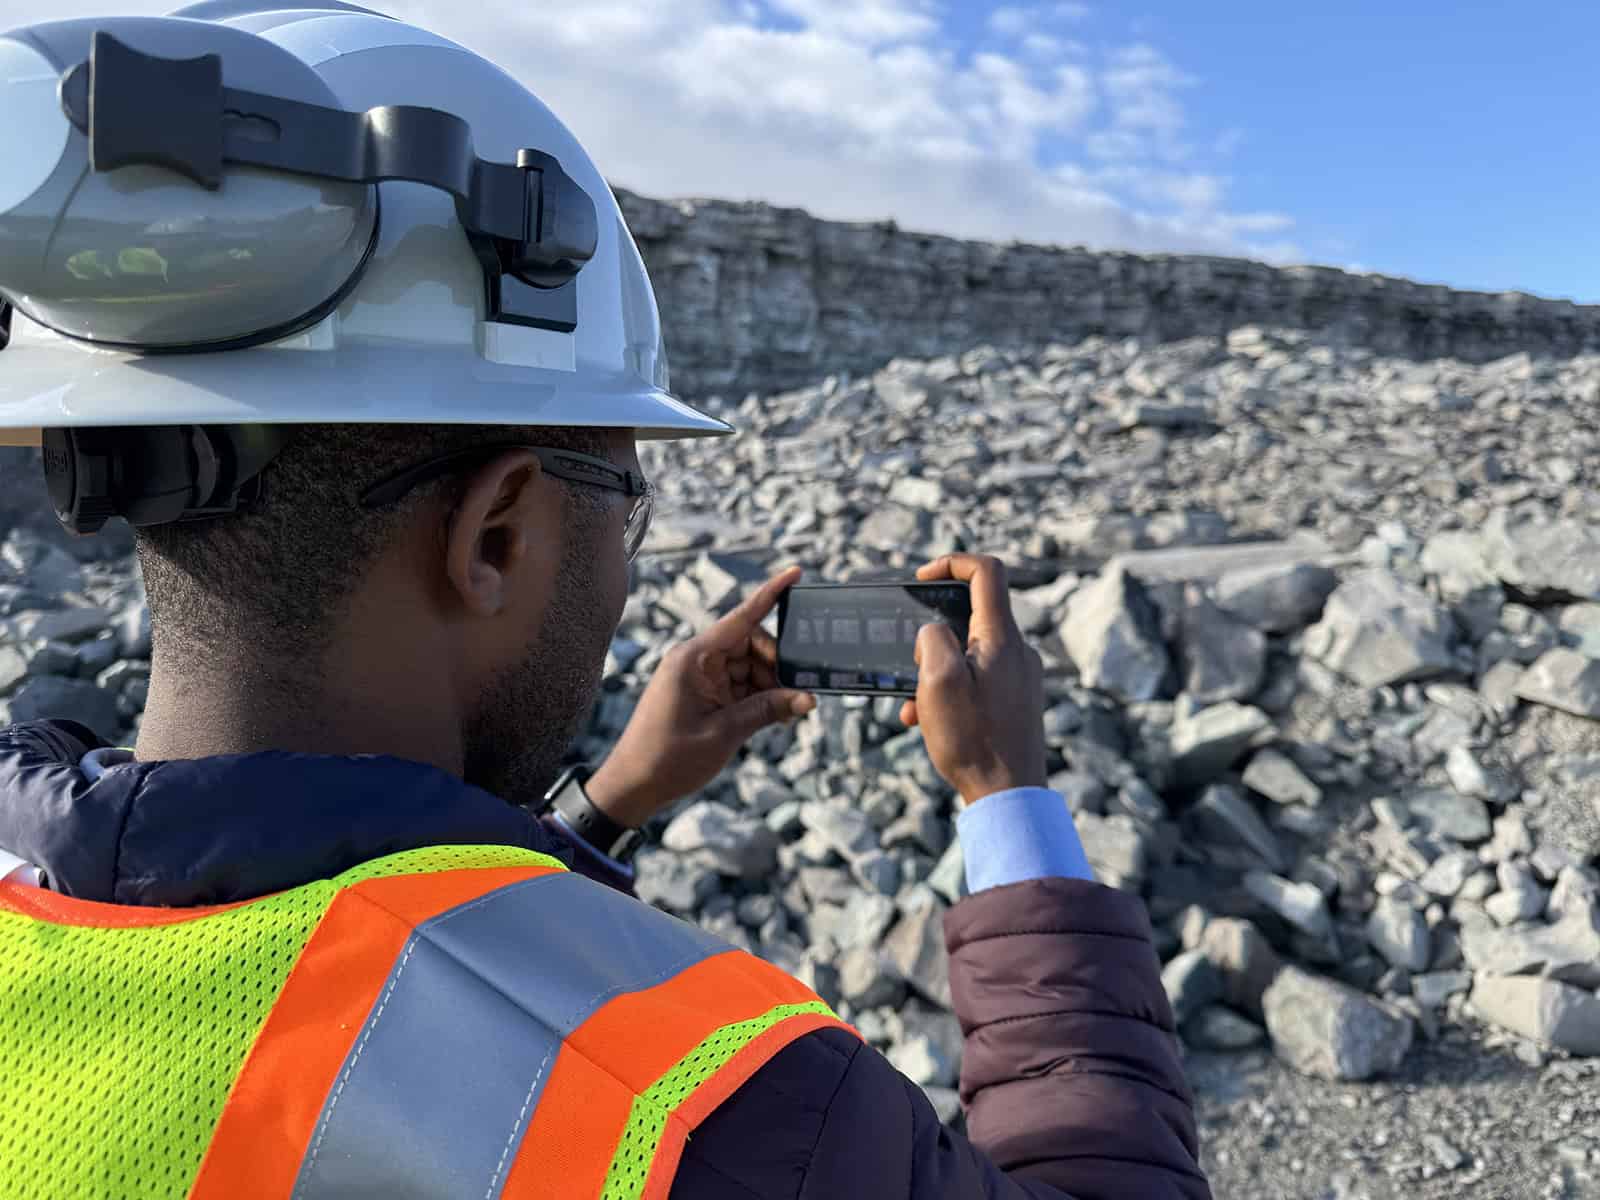
When capturing directly through WipFrag on a supported mobile device, Auto Scale can eliminate the need to place a physical scale in the image. For Auto Scale, position yourself on the same general level as the material being captured.
Read more about Auto Scale in the WipFrag User Manual or watch the Auto Scale tutorial video on YouTube.
Distance Scale (EDM)
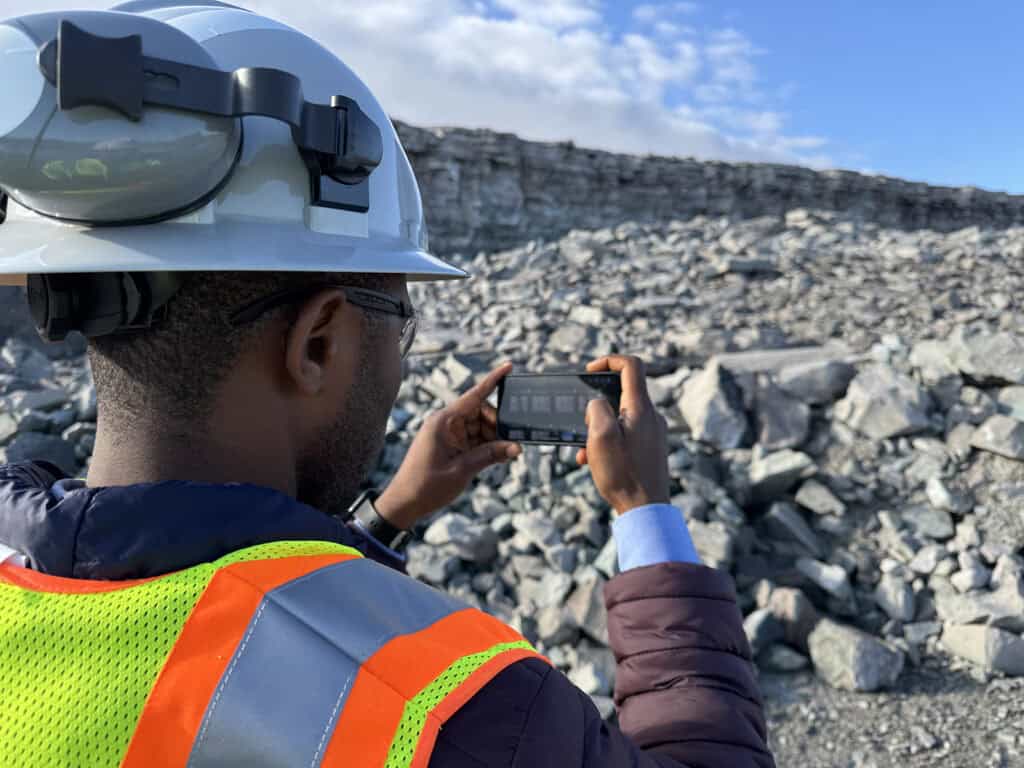
An electronic distance measurement (EDM) device can be used to measure the distance between camera and material. You must also know the material’s angle of repose relative to the camera view axis. These values will then be used by WipFrag to calculate material scale. This method allows for the use of optical zoom lenses. This method can also be used with drones to capture scaled single images of material piles and/or highwalls, provided the drone can indicate its distance from the material.
Read more about Distance Scale in the WipFrag User Manual.
Single Scale
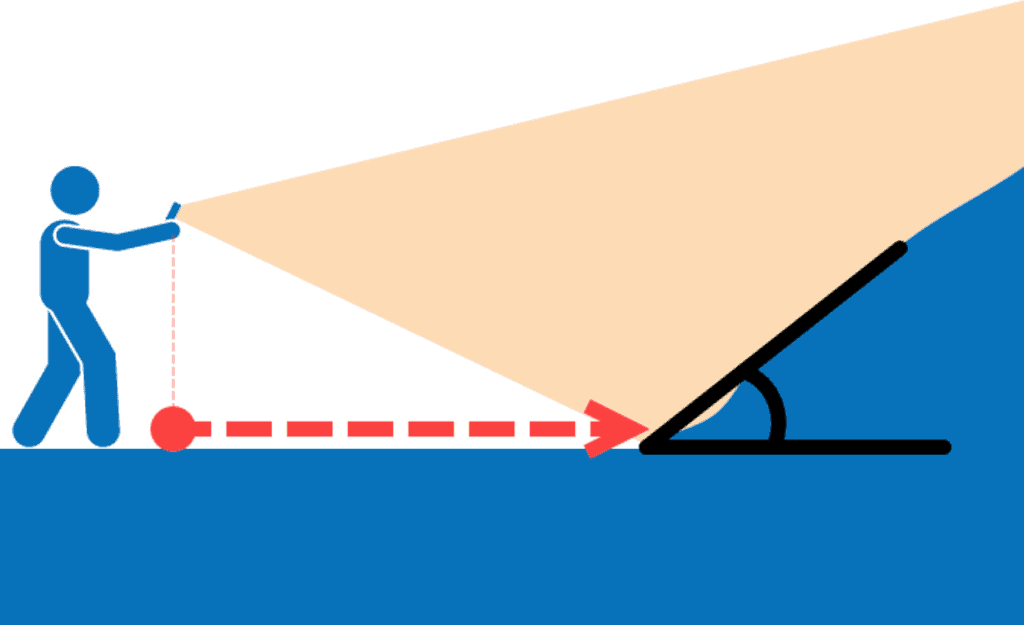
Use one physical scale when the material is approximately on one plane with little depth change across the image. This is NOT the best method for field images unless capturing a relatively flat surface from a top-down or perpendicular position.
Read more about physical scale reference objects in the WipFrag User Manual.
Dual Scale
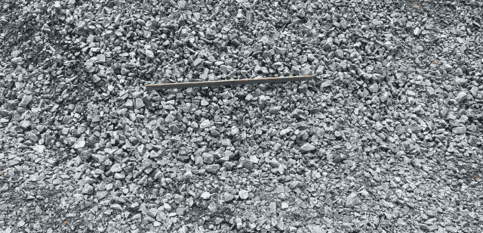
Use two physical scales when the material slopes significantly away from the camera. Place the scales at different depths (foreground vs background), oriented horizontally in the image, so WipFrag can account for the change in perspective. This is the best method for field images when using physical scale reference objects.
Read more about physical scale reference objects in the WipFrag User Manual.
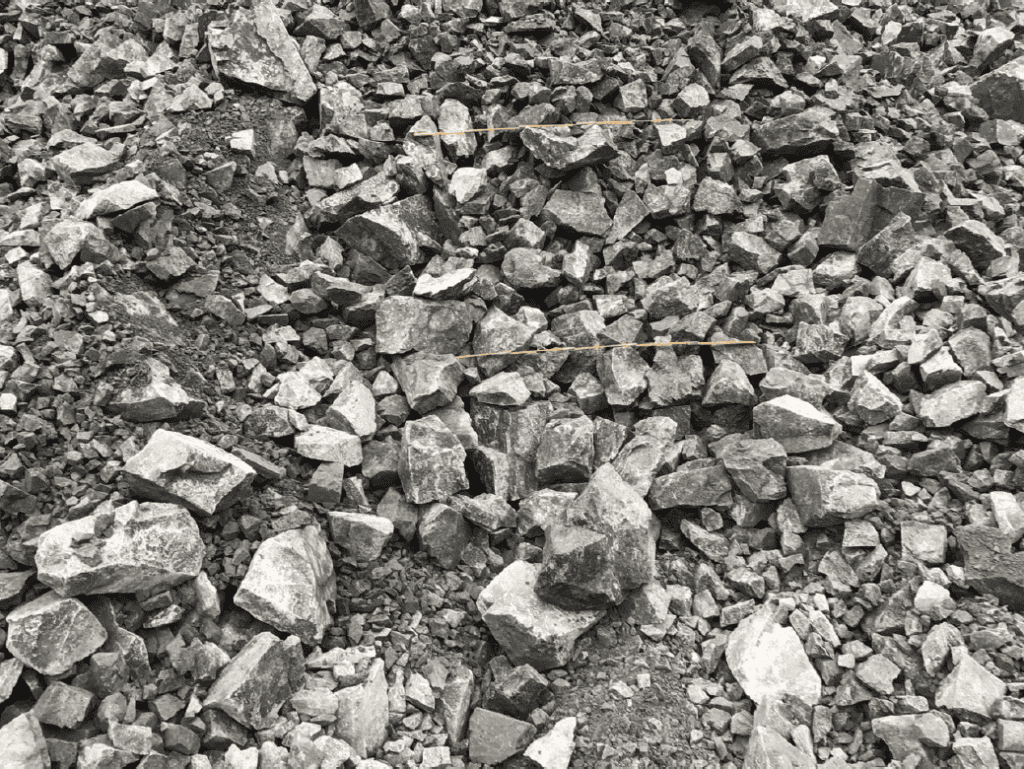
Keep physical scales clearly visible and place them where they do NOT hide important material.
| TERRESTRIAL IMAGES – DO |
|---|
|
✓
Capture several representative locations.
|
|
✓
Fill the frame with material.
|
|
✓
Keep the image sharp and in focus.
|
|
✓
Capture enough particles to represent the sample.
|
|
✓
Use even lighting where practical.
|
|
✓
Use the appropriate scaling method.
|
|
✓
Keep images from each pile, blast or sample grouped together.
|
|
✓
Capture additional views when one image cannot show the full relevant size range.
|
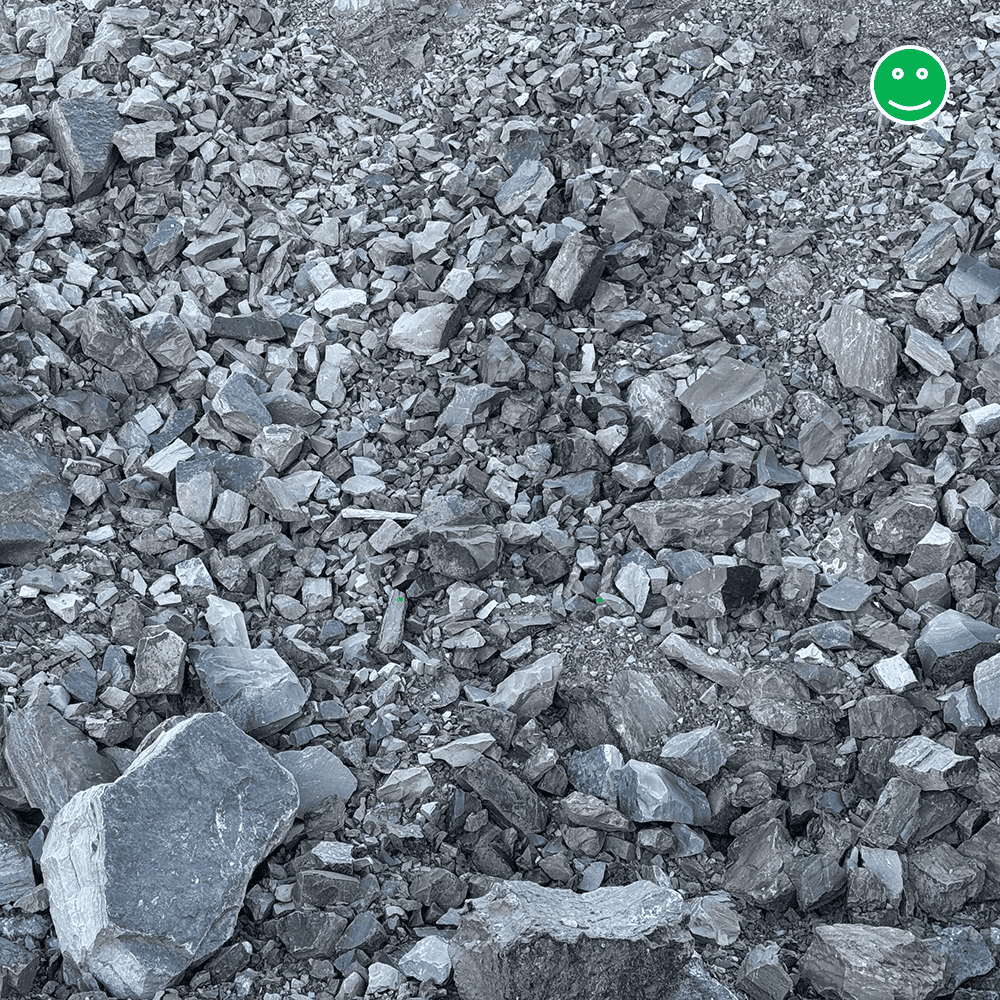
| TERRESTRIAL IMAGES – AVOID |
|---|
|
✕
Selecting only the coarsest or finest-looking areas.
|
|
✕
Relying on one convenient photograph to represent a large or variable sample.
|
|
✕
Extreme oblique angles.
|
|
✕
Close wide-angle views.
|
|
✕
Digital zoom.
|
|
✕
Using a single scale where there is significant depth or slope.
|
|
✕
Entering unstable material to place a scale object.
|
|
✕
Filling the image with unnecessary sky, ground, equipment or surroundings.
|
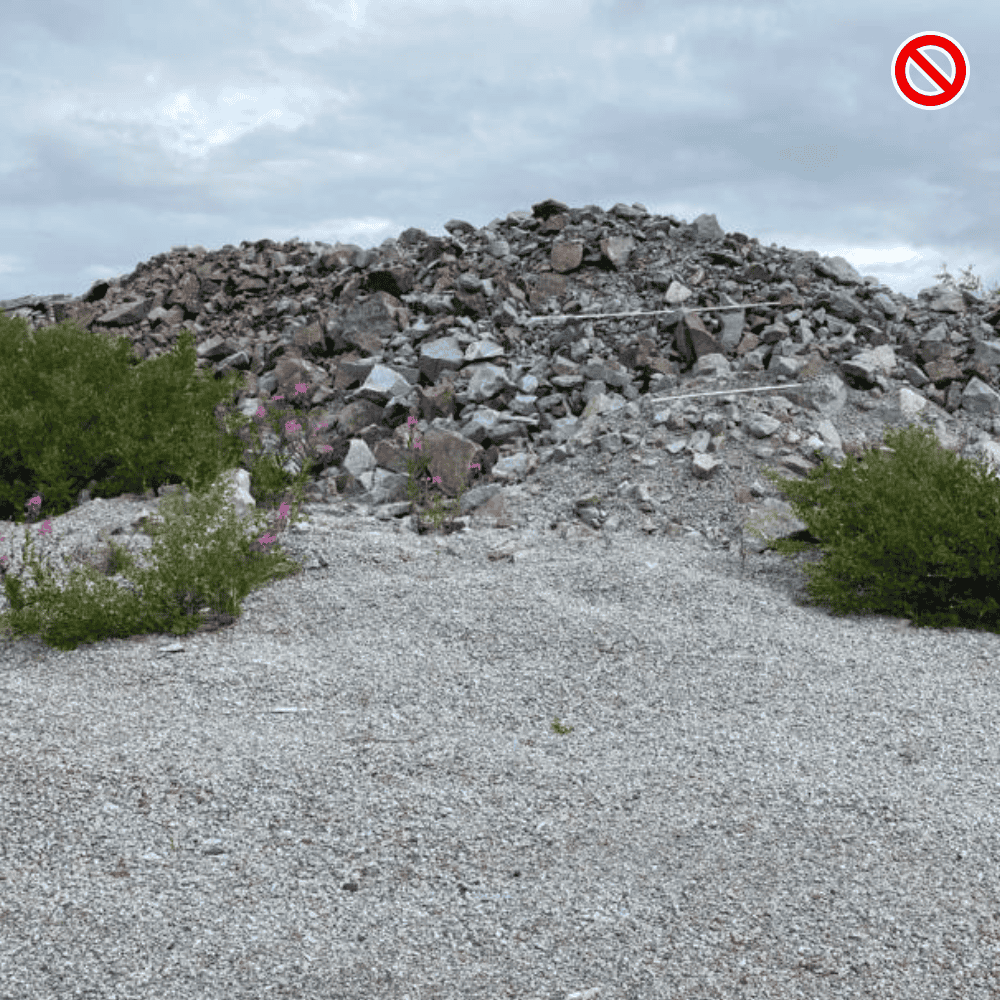
| REMEMBER |
| You do NOT require scale reference objects to use WipFrag. The built-in Auto Scale feature is extremely powerful. Try it out a few times to see how it works for your device type. |

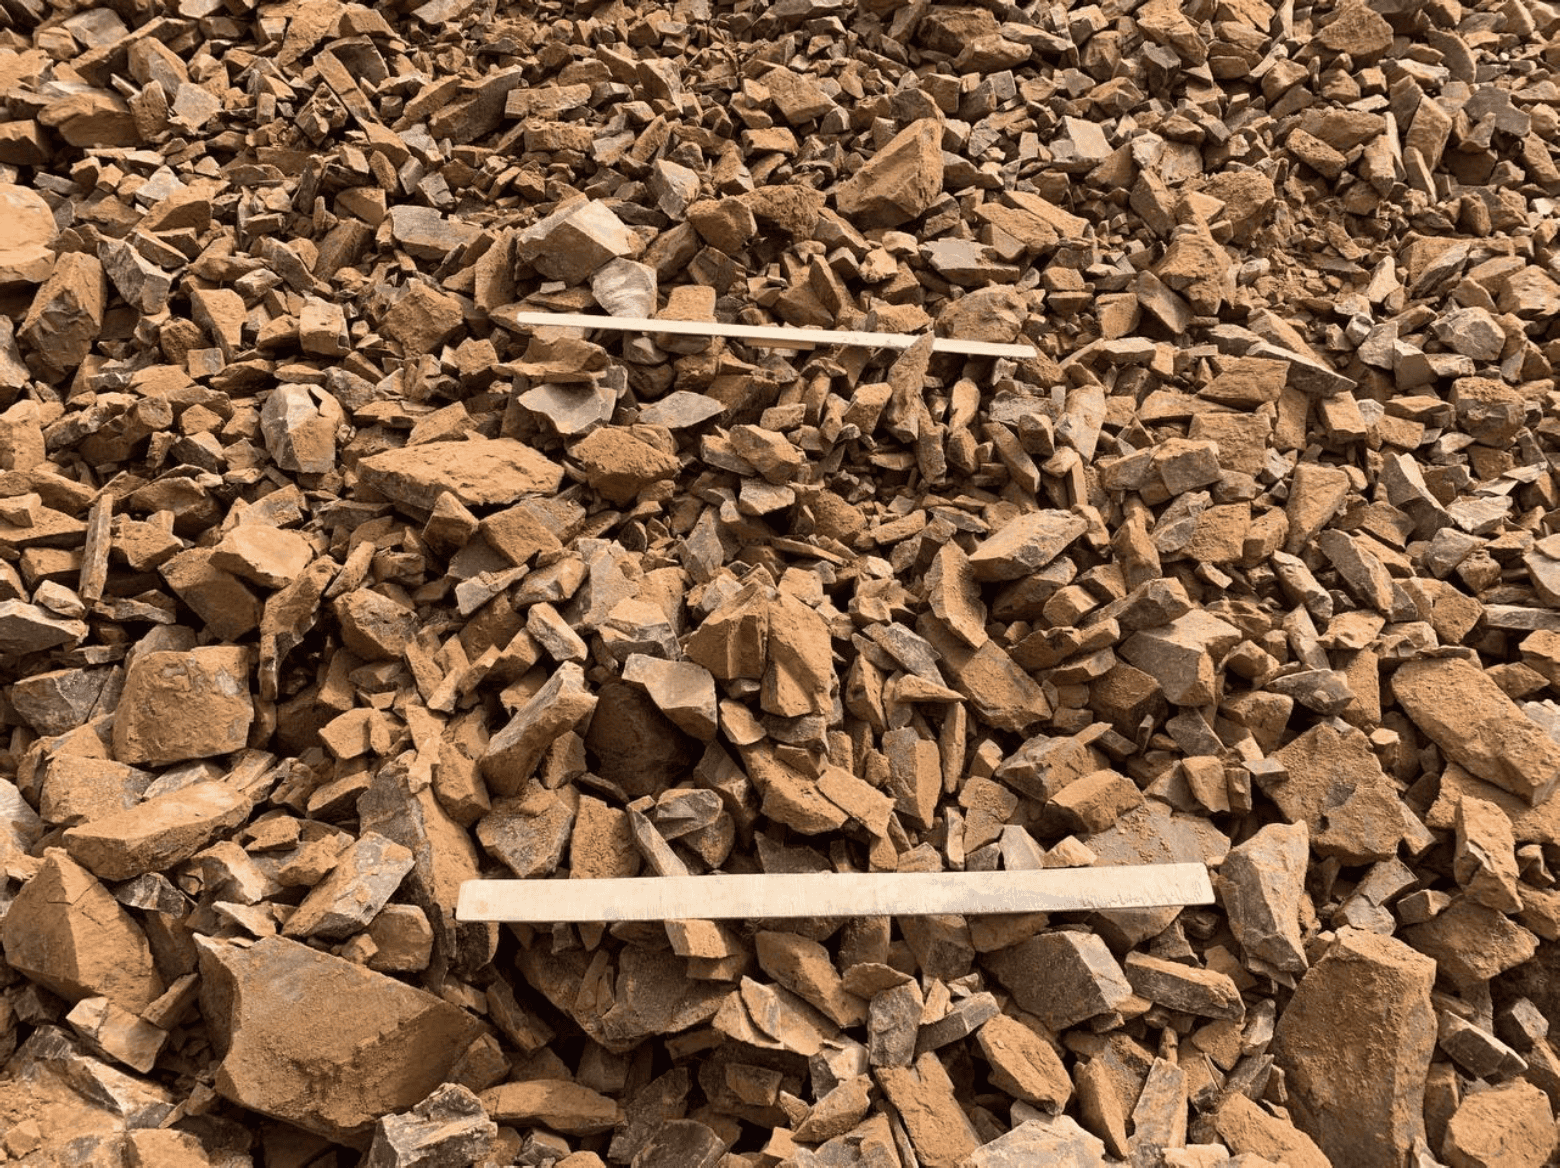
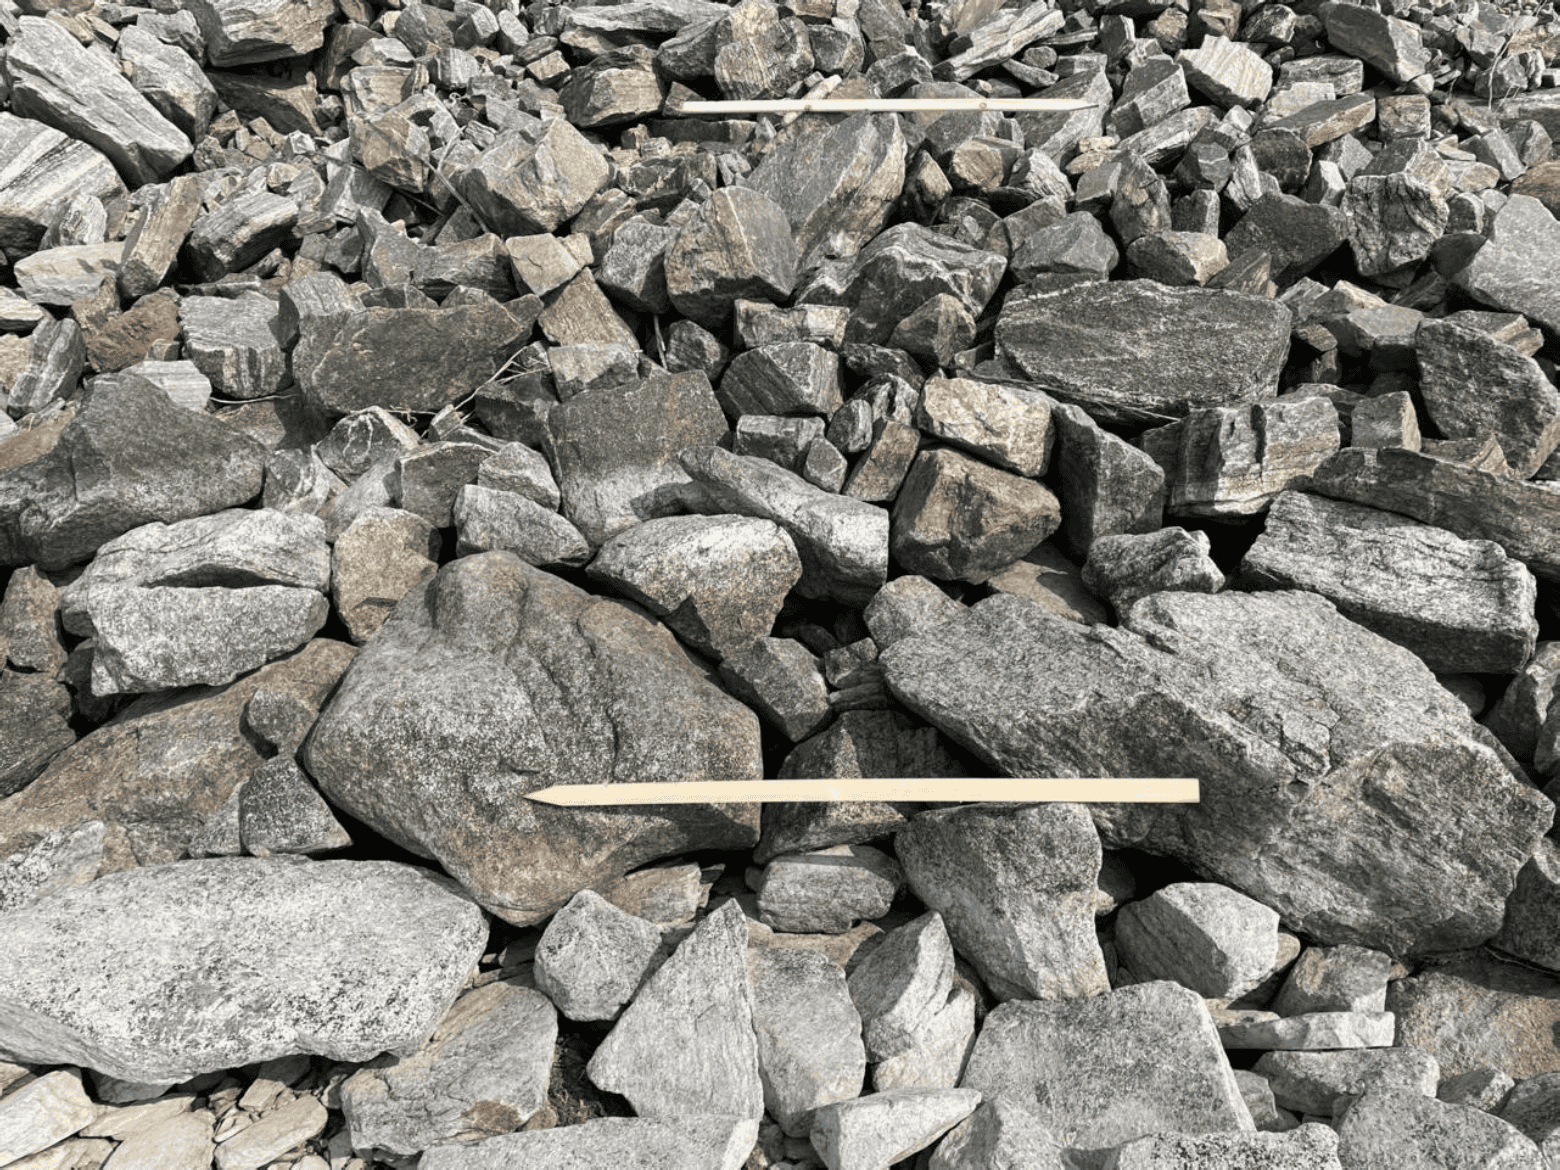
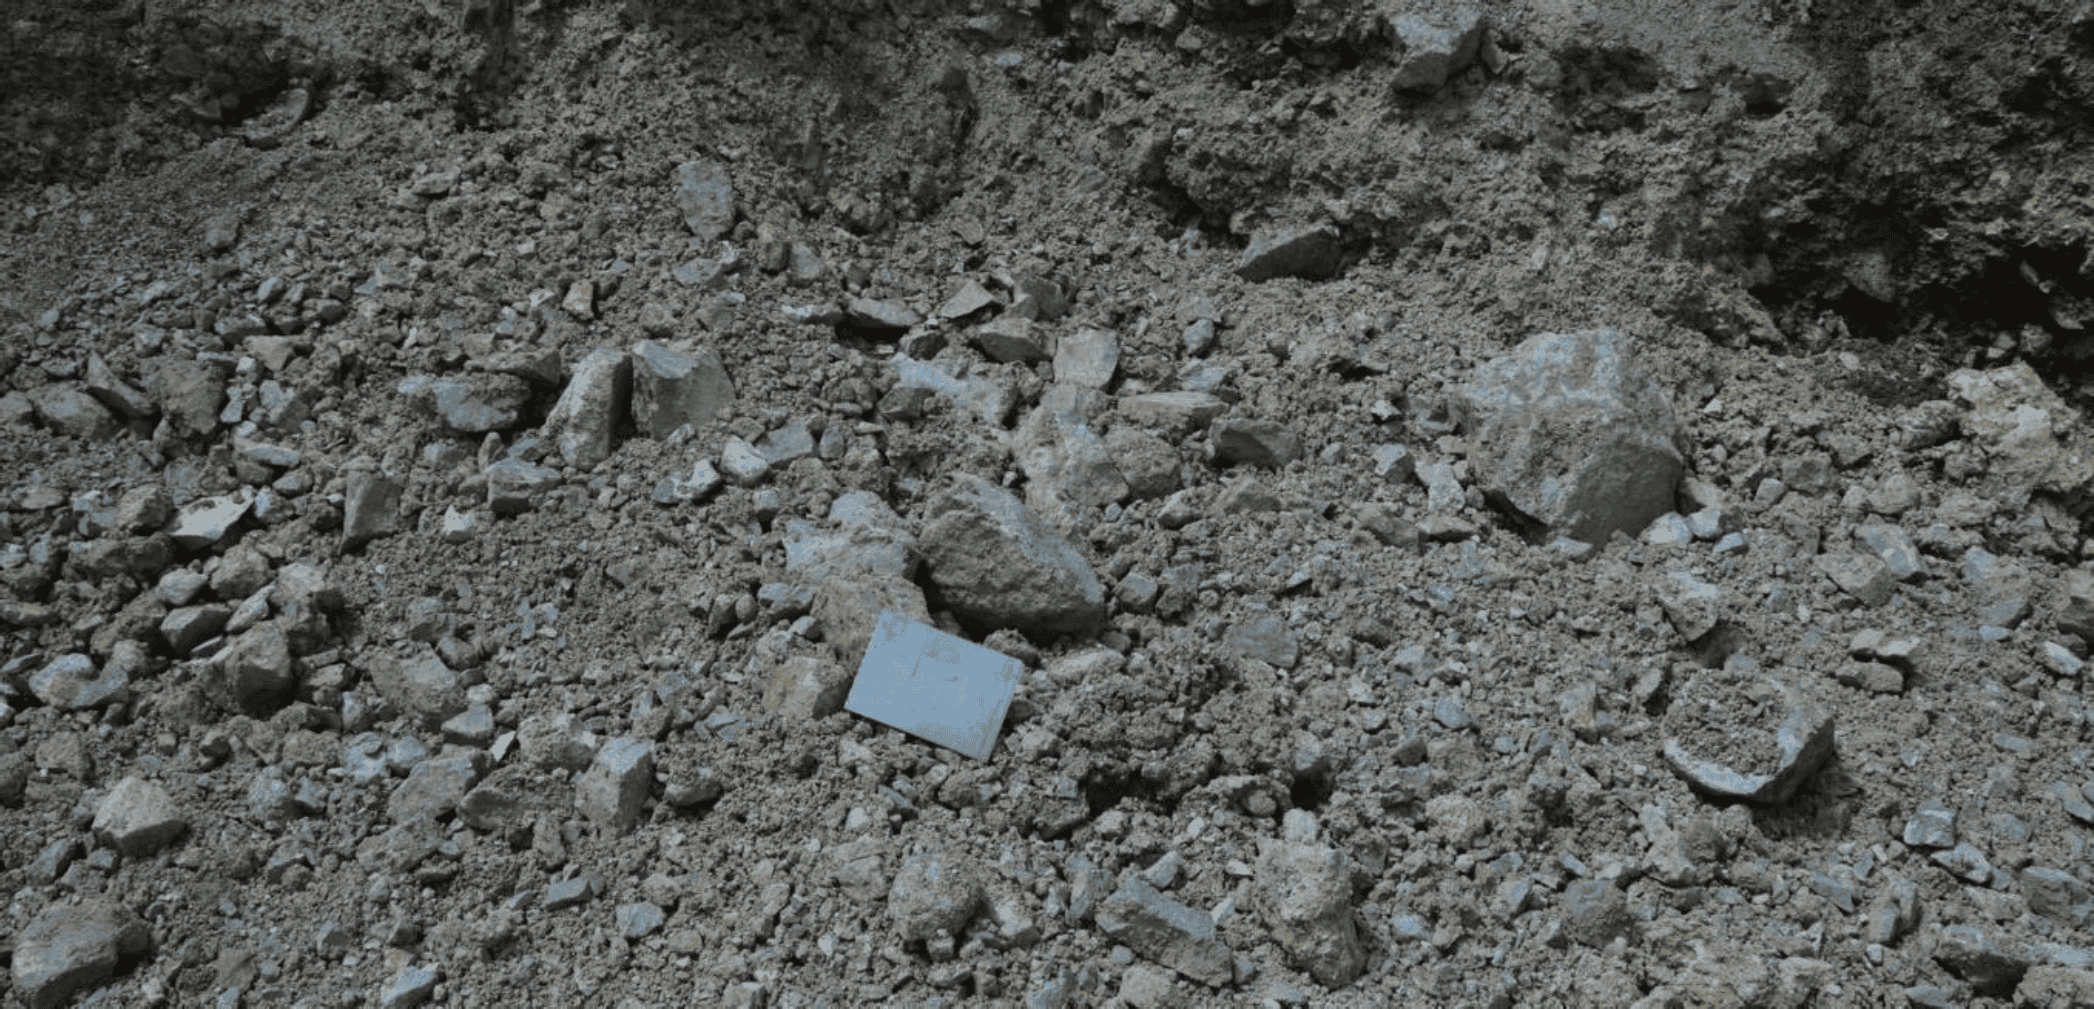
Example Terrestrial Images – Good:
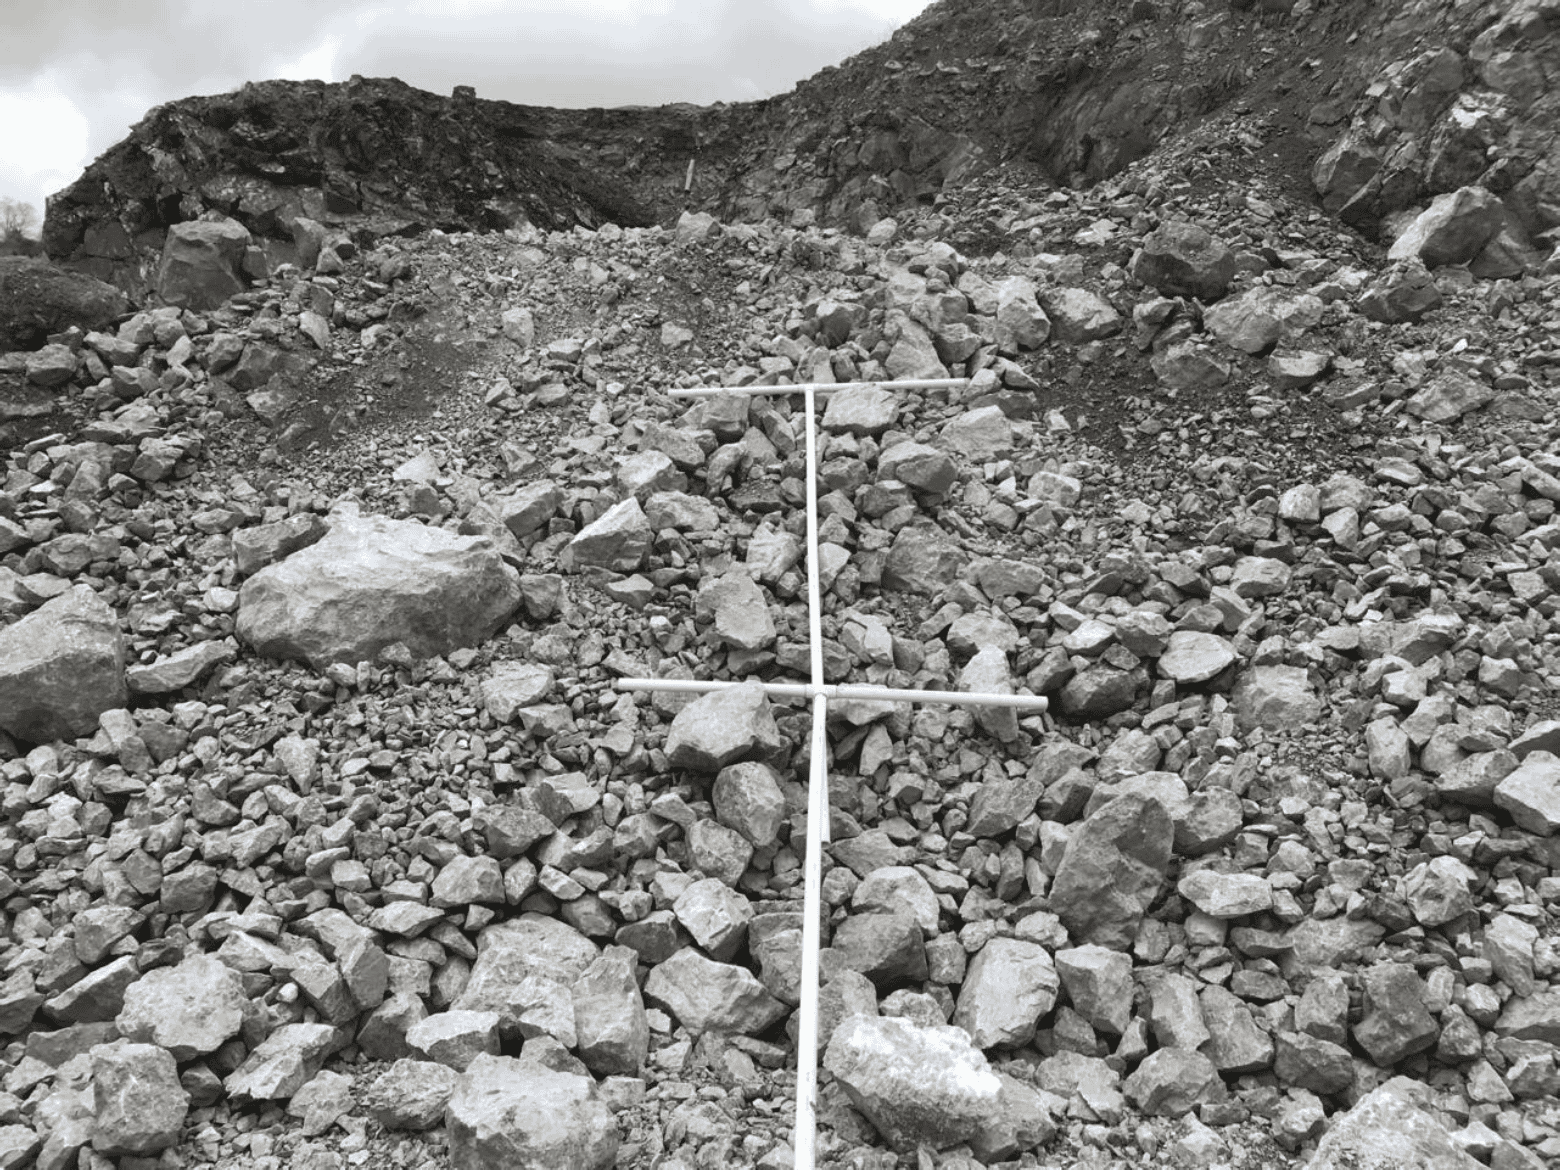

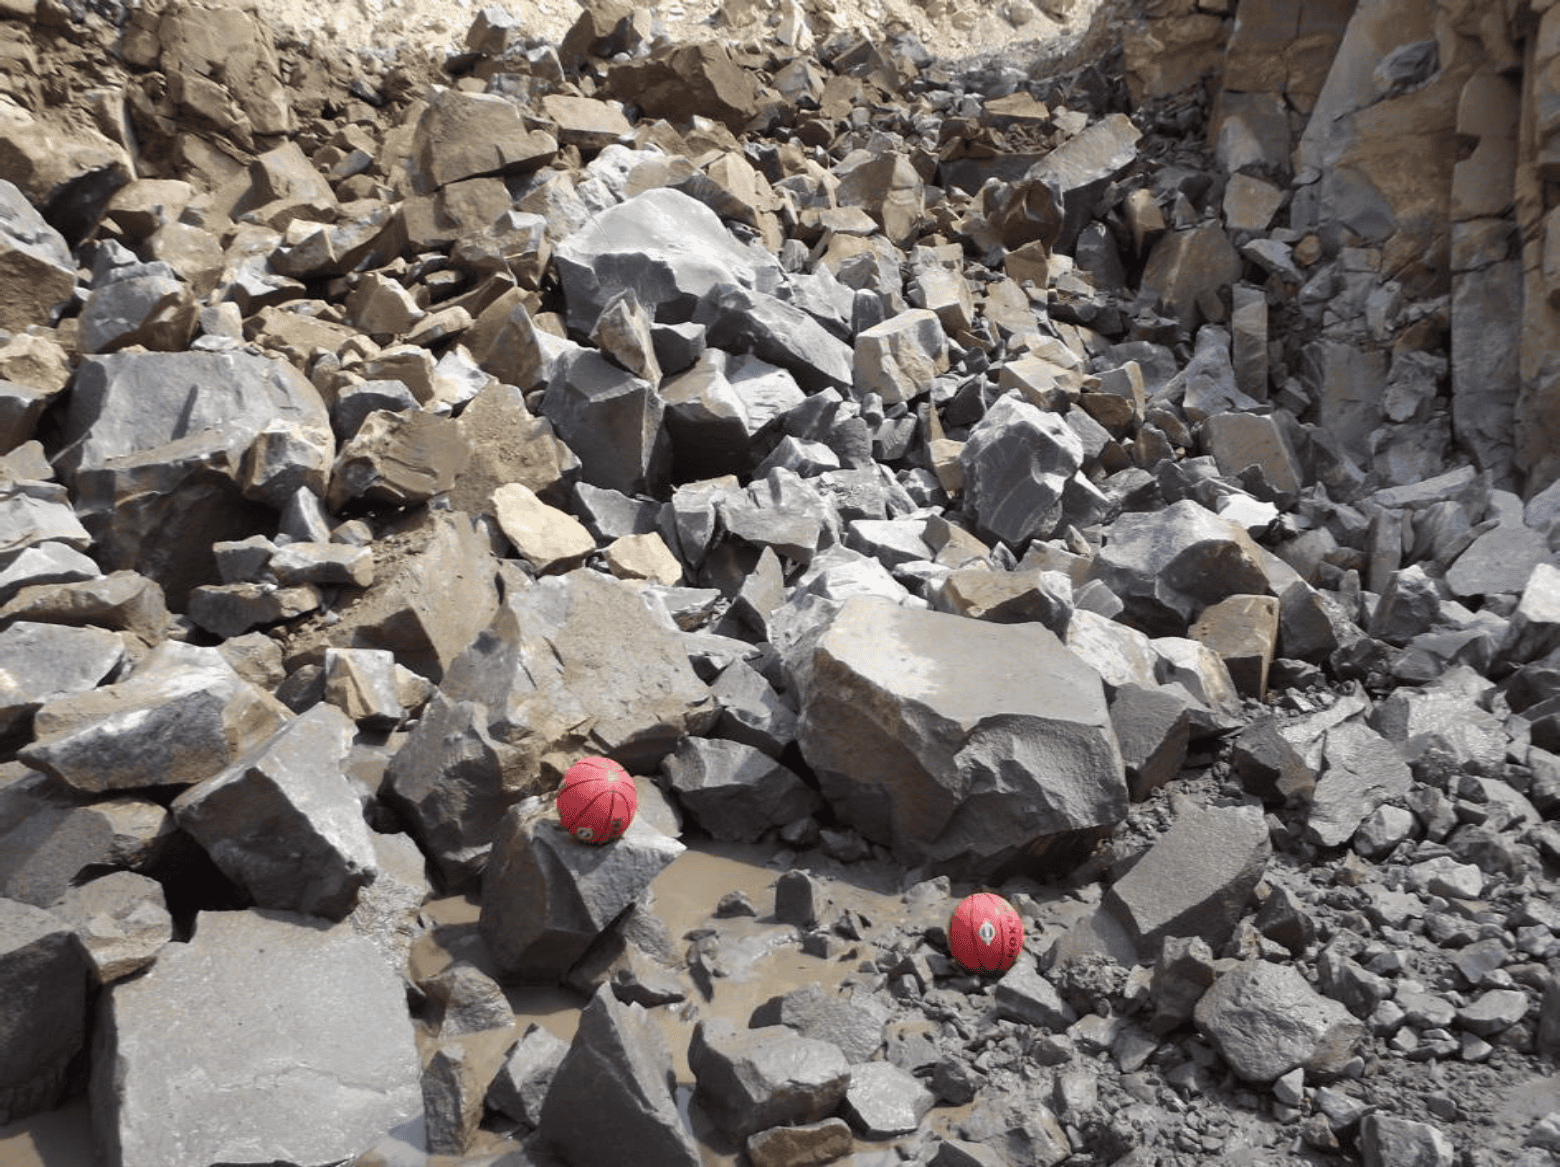
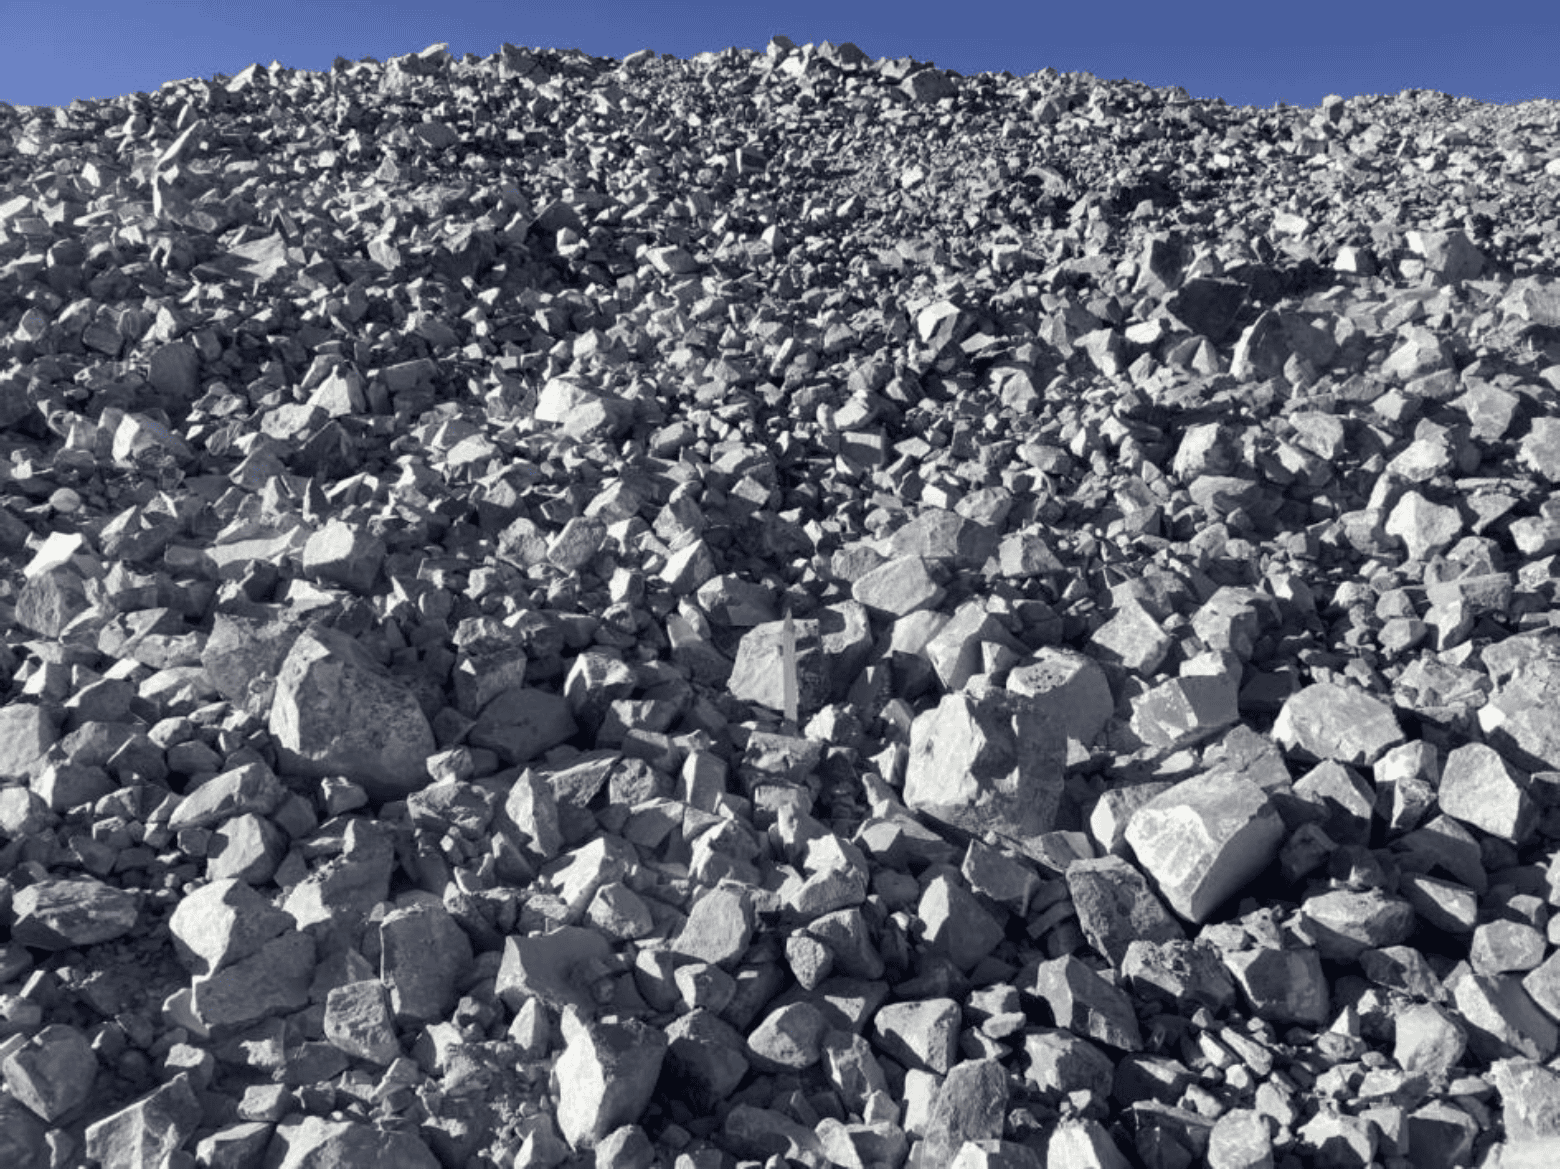
Example Terrestrial Images – Bad:
2. UAV / Drone Images – Large-Area Capture

UAV imagery is useful for large piles, blasts, stockpiles, and other areas that are difficult to represent with ground-based photographs.
For WipFrag orthomosaic analysis, focus on three things: complete coverage, sufficient overlap, and enough image detail to see the particles that matter.
Plan the flight
Cover the entire area you intend to analyze, including its edges.
For an automated mapping flight:
- Point the camera straight down (90°).
- Use approximately 80% image overlap in the direction of travel and between adjacent flight lines.
- Use a regular grid or mapping flight pattern.
- Keep a consistent altitude during the mapping pass.
- Capture sharp still images without motion blur.
Choose the right altitude
As a practical starting point, 20–40 m above the material works well for many applications.
Adjust the altitude for the camera, particle size, area being covered, and terrain
Flying higher covers more area but reduces particle detail. Flying lower provides more detail but requires more images and careful coverage.
Fly low enough that the particles you care about remain clearly visible.
Check flight conditions
Choose conditions that allow the UAV to remain stable and produce sharp, evenly exposed images.
Avoid strong wind, rain, poor visibility, heavy glare, deep shadows, or other conditions likely to produce blurred or poorly exposed images.
Before leaving the site, check the images for sharpness and complete coverage whenever practical.
Scaling UAV imagery
A physical scale object is NOT normally required for WipFrag’s UAV orthomosaic workflow.
Refer to the WipFrag User Manual for the current orthomosaic creation, scaling, and analysis procedure, or check out the UAV orthomosaic tutorial on our YouTube channel.
| UAV IMAGES – DO | UAV IMAGES – AVOID |
|---|---|
|
✓
Cover the complete blast or sample area.
|
✕
Oblique scenic photographs for orthomosaic analysis.
|
|
✓
Use a repeatable mapping flight.
|
✕
Missing the perimeter of the blast.
|
|
✓
Point the camera straight down.
|
✕
Insufficient image overlap.
|
|
✓
Maintain approximately 80% overlap.
|
✕
Flying unnecessarily high.
|
|
✓
Fly low enough to resolve the particles you care about.
|
✕
Flying so low that coverage becomes fragmented or incomplete.
|
|
✓
Check image sharpness and coverage after the flight.
|
✕
Blurred images.
|
|
✓
Keep images from different blasts or flights clearly separated.
|
✕
Mixing images from separate blast rounds in one orthomosaic.
|
| MANUAL UAV FLIGHT AND CAPTURE |
| If automated flight paths are NOT available for your UAV / drone, use the staircase method: |
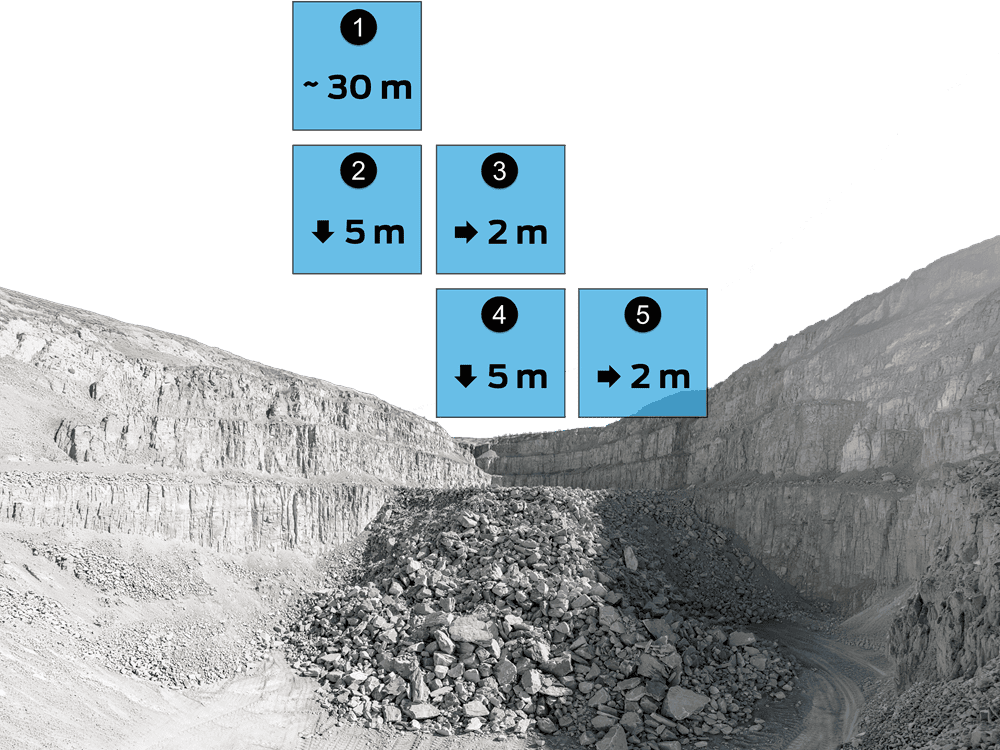
- Start at an altitude of approximately 30 metres (98.5 feet) above the subject. Capture an image.
- Move downwards by 5 metres (16.5 feet). Capture an image
- Move horizontally by 2 metres (6.5 feet). Capture an image.
- Move downwards by 5 metres (16.5 feet). Capture an image
- Move horizontally by 2 metres (6.5 feet). Capture an image.
- Repeat this pattern as needed, moving across the sample area. Capture at least 5 photos.
3. Underground Image Capture

Underground image capture follows the same basic principles as field photography, but lighting and working distance need extra attention.
Start with a safe viewpoint
Work from a safe position with a clear view of the material.
Do NOT enter unsupported ground, an active heading, or unstable material just to improve an image or place a scale.
Use broad, even lighting
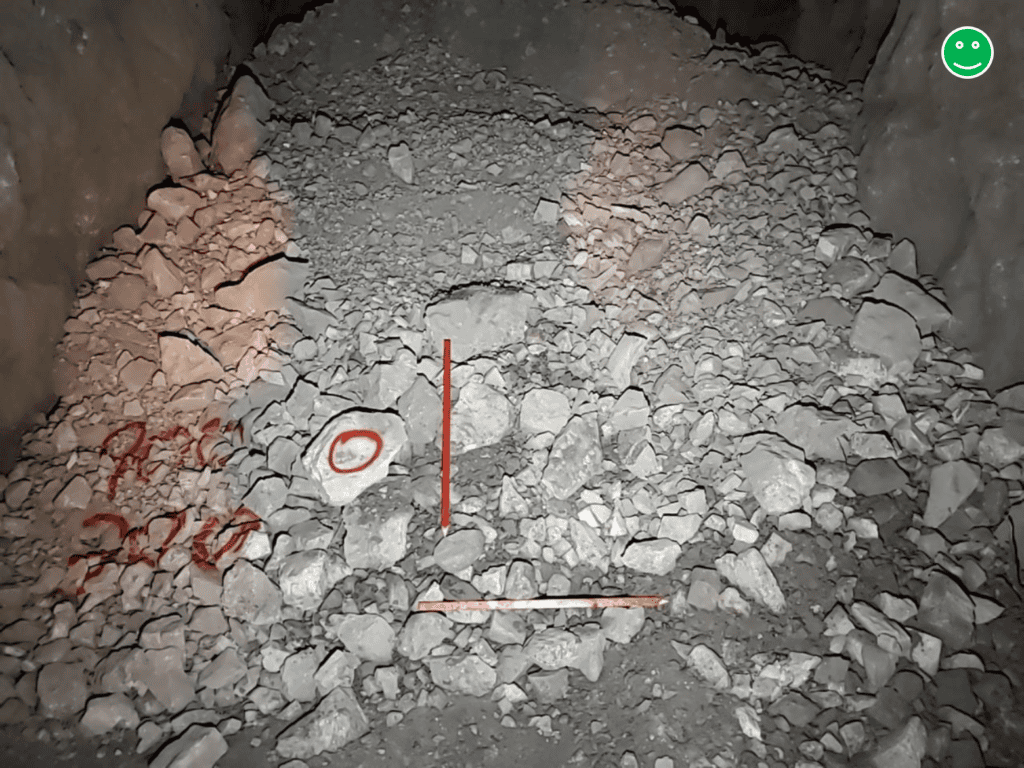
Use enough light to keep particle boundaries visible without creating deep shadows or bright hot spots.
Where practical:
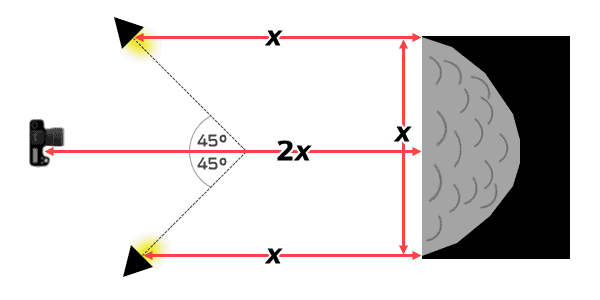
- position one light to each side of the camera;
- elevate the lights;
- aim them across the material rather than directly from the camera position; and
- use broad, portable light sources such as LED panels.
This creates more even illumination while still leaving enough shadow to distinguish neighbouring particles.
Avoid direct camera flash
Do NOT rely on a built-in or camera-mounted flash as the main light source. Light coming from close to the lens can flatten the image and make particle boundaries harder to see.
A single strong light from one side can create the opposite problem by producing large dark shadows.
Use multiple broad light sources where practical.
Stabilize the camera
Use a tripod or other stable support when lighting is limited.
A sharp image with a longer exposure is better than a handheld image with motion blur.
Capture large headings and piles in sections
Do NOT move so far away that the particles you care about become too small to see just to fit the entire area into one image. Instead, capture the area in several repeatable sections and combine the analyses where appropriate.
UNDERGROUND IMAGE Capture Geometry
Where x is the width of the sample area, which is also the distance to the lighting sources. The camera’s capture position should be twice that distance (2×x) away.
| UNDERGROUND IMAGES – DO |
|---|
|
✓
Work from a safe location.
|
|
✓
Use two or more broad light sources where possible.
|
|
✓
Position lights away from the camera axis.
|
|
✓
Use a tripod in low light.
|
|
✓
Fill the frame with the material being sampled.
|
|
✓
Capture large areas in systematic sections when needed.
|
|
✓
Use Dual Scale when photographing material with significant depth.
|
| UNDERGROUND IMAGES – AVOID |
|---|
|
✕
Camera-mounted flash.
|
|
✕
One harsh spotlight.
|
|
✕
Deep shadows that hide material.
|
|
✕
Bright glare on wet surfaces.
|
|
✕
Noisy or blurred images when better lighting or camera support is available.
|
|
✕
Moving farther away just to fit everything into one image.
|
|
✕
Entering unsafe ground to place a scale.
|
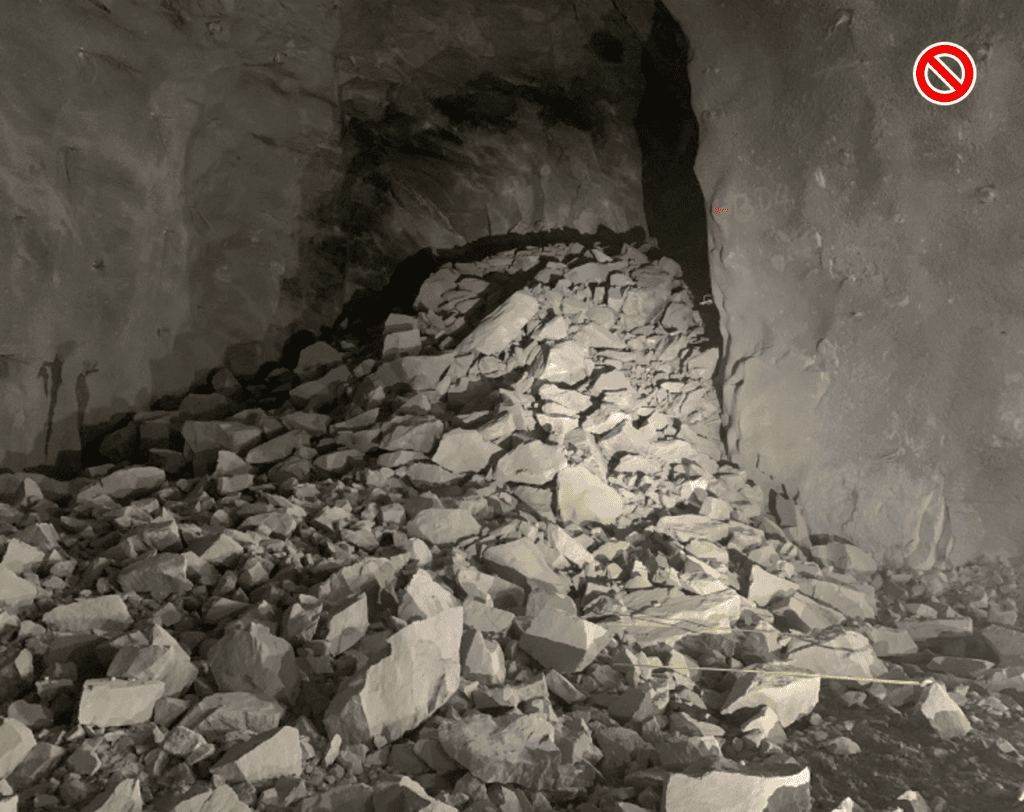
4. Lab Samples, Trays, and Microscopy
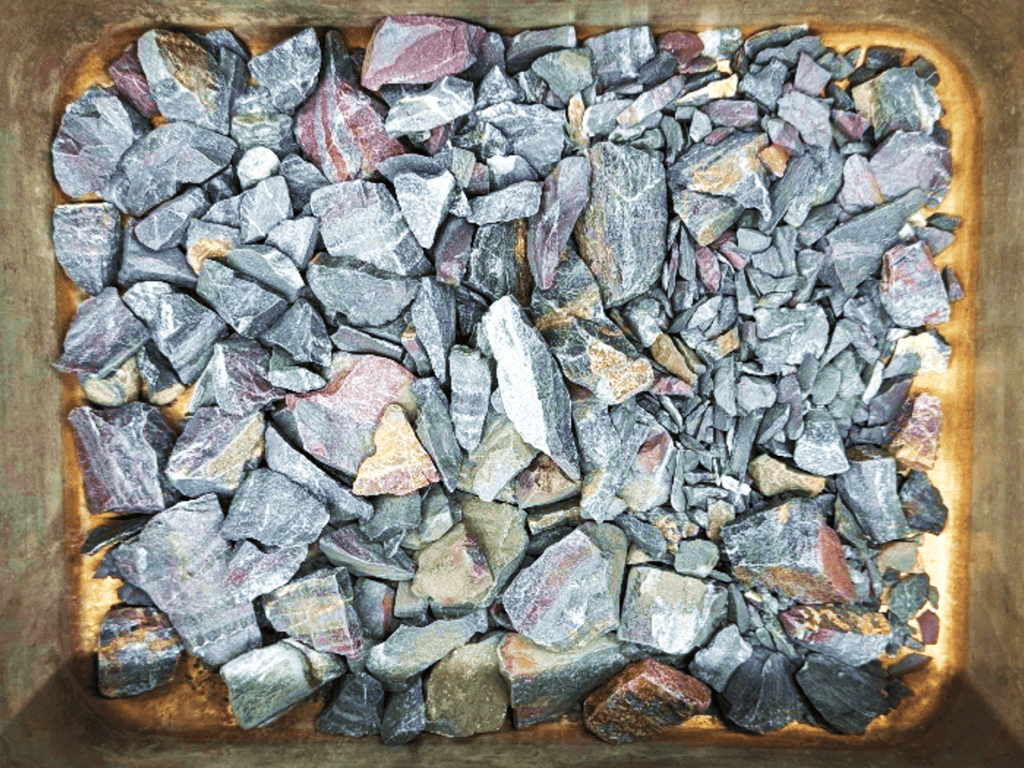
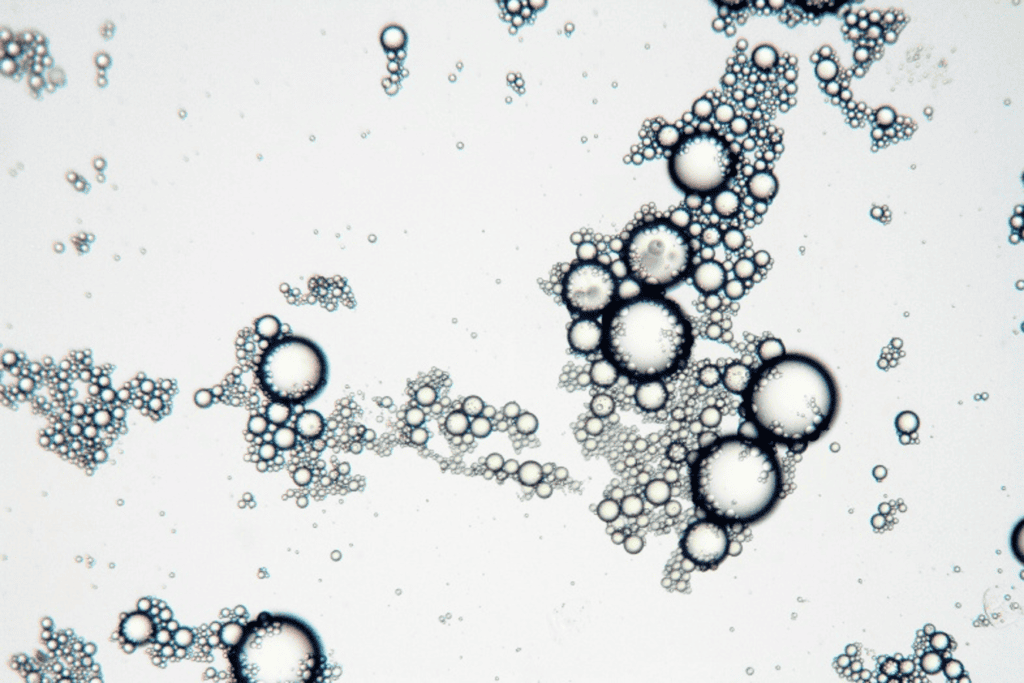
For controlled samples, the priority is repeatability. Keep sample preparation, camera position, lighting, and scale consistent between comparable analyses.
Prepare the sample
Spread the material so the particles you need to measure are visible.
Do NOT arrange particles by size or remove particles simply to make the image easier to analyze. The photographed material should remain representative of the sample.
If particles overlap enough to hide their boundaries, reduce the sample depth or divide the material into multiple representative portions.
Capture directly from above
Position the camera perpendicular to the tray or sample surface.
For repeated testing, use a fixed camera stand or tripod where practical. Keep the camera height, field of view, lighting, and sample area consistent from one analysis to the next.
Use even lighting
Use diffuse, even lighting across the full sample.
Avoid strong directional shadows, reflections, bright hot spots, or uneven illumination.
Scale the image
For a flat tray or sample, use a Single Scale placed on the same plane as the material.
Top-down images can also be captured using the supported Auto Scale workflow. Refer to the WipFrag User Manual for Auto Scale instructions.
| LAB & TRAY IMAGES – DO | LAB & TRAY IMAGES – AVOID |
|---|---|
|
✓
Use a repeatable camera position.
|
✕
Arranging or selecting particles to change the apparent distribution.
|
|
✓
Photograph perpendicular to the sample.
|
✕
Tilting the camera.
|
|
✓
Use even, diffuse lighting.
|
✕
Deep layers that hide particle boundaries.
|
|
✓
Fill most of the image with sample material.
|
✕
Placing the scale above or below the particle plane.
|
|
✓
Keep sample preparation consistent.
|
✕
Changing the capture setup between comparable samples.
|
|
✓
Keep a physical scale on the same plane as the material.
|
✕
Strong shadows, reflections, or glare.
|
For microscope images
The same principles apply at microscopic scale: clear particles, known scale, consistent capture conditions, and representative sampling.
- Keep the particles of interest clearly resolved and in focus.
- Use a scale appropriate to the microscope magnification.
- Keep magnification consistent when comparing samples.
- Use even illumination across the field of view.
- Avoid overexposure that causes neighbouring particles to merge visually.
- Capture several representative fields of view rather than selecting only the cleanest or easiest areas.
- Keep sample preparation consistent between comparative analyses.
| MICROSCOPE IMAGES – DO | MICROSCOPE IMAGES – AVOID |
|---|---|
|
✓
Use a calibrated scale.
|
✕
Using a scale from a different magnification.
|
|
✓
Maintain consistent magnification.
|
✕
Selecting only the easiest areas to analyze.
|
|
✓
Keep the imaging plane in focus.
|
✕
Using images where neighbouring particles cannot be distinguished.
|
|
✓
Capture multiple representative fields of view.
|
✕
Changing microscope or capture settings during a comparative study without documenting the change.
|
|
✓
Record the magnification or scale used.
|
5. Before You Leave the Sample
WipFrag Capture Checklist
Before moving on, confirm:
- Representative — Did I capture the material according to the sampling plan rather than choosing only what looked interesting?
- Enough coverage — Have I captured enough images to represent the sample area?
- Sharp — Can I clearly distinguish the particles of interest?
- Properly framed — Is the image mostly filled with the material being measured?
- Good lighting — Are particle boundaries visible without excessive shadow, glare, or overexposure?
- Correct scale — Am I using Auto Scale, Single Scale, Dual Scale or the UAV workflow appropriately?
- Full size range — Can I see the particle sizes that matter, or do I need additional closer or wider images?
- Organized — Do I know which images belong to this sample, pile, blast, flight, or project?
| MORE INFORMATION |
|
For step-by-step instructions on scaling methods, UAV orthomosaic creation, merging analyses, edge detection and other WipFrag software functions, refer to the latest WipFrag User Manual, the WipFrag FAQ or visit our Videos library for tutorials. Once your analysis is complete, use the Results Interpretation Guide to understand the PSD curve, D-values, statistics, histogram, specification envelope, shape measurements and other WipFrag results. |
Additional Information
Accounts, Subscriptions and Credits
Visit wipwareaccount.com/register to make a free WipWare Account. Your WipWare Account contains your WipFrag subscription and/or image credits, plus your cloud-synchronized analysis files.
If you already have an account, you can log in at wipwareaccount.com/login. There you can change your account details, manage the devices connected to your WipWare account and explore other options. Ensure you log in to your WipWare Account inside WipFrag to access your paid features, use your cloud storage and synchronize your analysis files.
Contact your regional WipWare representative to purchase or renew your subscription, or to add more credits to your account. You may also purchase or renew online with PayPal or a credit card by visiting wipwareaccount.com/store. There is no auto-renewal available for WipFrag subscriptions.
| SOFTWARE UPDATES |
| Ensure you keep WipFrag up to date! Regular updates are provided for WipFrag via Internet. |
Field Equipment Examples
Note: Mobile devices must have an internal GPS, accelerometer, gyroscope, and magnetometer for full functionality.
| Smartphones | |
|---|---|
| Apple iPhone 12 Google Pixel 6a Samsung Galaxy S21 5G -or- A53 5G | Economical smartphones that meet basic requirements |
| Apple iPhone 15 Pro Max Samsung Galaxy S26 Ultra | Premium smartphones with larger screens and better cameras, sensors, and processors |
| Tablets | |
|---|---|
| Apple iPad Pro (5th Gen) [Cellular] Samsung Galaxy Tab A11 -or- S10 Lite | Economical tablets that meet basic requirements |
| Apple iPad Pro M4 [Cellular] Samsung Galaxy Tab S10 Ultra -or- S9 FE | Premium tablets with larger screens and better cameras, sensors, and processors |
| Digital Cameras | |
|---|---|
| OM System Tough TG-7 | Rugged economy field camera; waterproof, dustproof, shockproof, has GPS |
| OM System TCON-T01 | TG-7 accessory; optional teleconverter accessory for longer optical reach |
| Sony RX10 IV | Long-range superzoom camera; professional, non-ruggedized |
| Drones / UAVs | |
|---|---|
| DJI Mini 5 Pro | Manual flight drone; economy, sub-250g class |
| DJI Mavic 3 Enterprise | Recommended drone; premium, turnkey, compatible with automatic flight |
| Skydio X10 -or- X10D | Restricted / compliance drone; for NDAA / Blue UAS / Green UAS / etc. |
| Laser Distance Measuring Devices / EDMs | |
|---|---|
| Bosch BLAZE GLM165-22 –or- 27C | Economy; construction-grade |
| Leica DISTO X1 | Recommended; longer range, higher confidence |
| Underground Lights | |
|---|---|
| ULANZI VL200 | LED light panel; portable, lightweight, USB-charged or powered battery |
| Tripods / Light Stands | |
|---|---|
| ULANZI MT-89 | Telescopic tripod; portable, lightweight, semi-rugged, universal mount |
| ABOUT FIELD EQUIPMENT EXAMPLES |
| These examples are based on devices that consistently provide the best user experience. WipWare does NOT explicitly endorse these products. |
 WipWare